There are few confections as universally beloved and deeply satisfying as a square of rich, creamy chocolate fudge. It evokes memories of holiday gatherings, childhood treats, and cozy moments. But what if we told you that achieving this decadent delight doesn't require a candy thermometer, precise boiling times, or a long list of ingredients? Prepare to be amazed by the ultimate shortcut to dessert bliss: the 3-ingredient chocolate fudge recipe.
Forget the fuss and embrace the simplicity. This foolproof method delivers velvety, melt-in-your-mouth fudge that tastes every bit as luxurious as its more complex counterparts, all with just three pantry staples and minimal effort. Whether you're a seasoned baker or a kitchen novice, this recipe guarantees consistently perfect results, making it your new go-to for satisfying those chocolate cravings, whipping up a last-minute gift, or simply indulging in a sweet treat.
Why Our 3-Ingredient Chocolate Fudge Recipe is a Game-Changer
When you think of traditional fudge, you might picture bubbling pots, careful temperature monitoring to reach the "soft ball stage," and a significant time commitment. While those classic methods certainly yield wonderful results – like those Easy Classic Chocolate Fudge: Your Go-To Homemade Recipe often relies on – they can be intimidating for many home cooks. This 3-ingredient version cuts through all that complexity without compromising on taste or texture.
- Unbeatable Simplicity: Literally three ingredients. That's it! No specialized equipment, no complex techniques. It’s the easiest way to make a homemade chocolate fudge recipe.
- Lightning Fast: From prep to pan in about 10-15 minutes of active time. The longest part is waiting for it to chill!
- Foolproof Results: The combination of chocolate chips, sweetened condensed milk, and butter is a magical trio that practically guarantees success. You won't have to worry about grainy texture or fudge that doesn't set properly.
- Rich, Decadent Flavor: Don't let the simplicity fool you. This easy chocolate fudge recipe is incredibly rich, sweet, and intensely chocolatey. The sweetened condensed milk provides a creamy base that complements the chocolate beautifully.
- Versatile Base: While perfect on its own, this recipe also serves as an ideal canvas for endless flavor variations, allowing you to customize it to your heart's content.
It's the ultimate solution for anyone craving homemade fudge without the commitment. This is the fudge you'll turn to for impromptu gatherings, last-minute bake sales, or simply because a chocolate craving struck.
The Magical Trio: What You'll Need for Your Perfect Chocolate Fudge
The beauty of this chocolate fudge recipe truly lies in its minimal ingredient list. Quality matters here, as each component plays a crucial role in creating that irresistible texture and flavor. Here’s a closer look at your essential ingredients:
1. Semi-Sweet Chocolate Chips
- Why Semi-Sweet? Semi-sweet chocolate chips strike the perfect balance, providing a rich chocolate flavor without being overly bitter or excessively sweet when combined with the condensed milk. They melt smoothly and consistently, forming the backbone of your chocolate fudge.
- Quality Matters: While any brand will work, opting for good quality chocolate chips can significantly enhance the final flavor. Look for brands that taste good on their own!
- Alternative Chocolates: Feel free to experiment! You can use milk chocolate chips for a sweeter, creamier fudge, or dark chocolate chips (60-70% cacao) for a more intense, less sweet chocolate experience. Just be aware that darker chocolates may result in a slightly firmer fudge.
- Weight vs. Volume: Most recipes specify chocolate chips by weight (e.g., 12 oz or 340g) which is often the standard bag size. Stick to this for best results.
2. Sweetened Condensed Milk
- The Secret Weapon: This is the ingredient that truly makes this chocolate fudge recipe foolproof. Sweetened condensed milk is a thick, syrupy milk product that has been concentrated and sweetened. It provides both the sweetness and the liquid necessary to create the smooth, creamy consistency of the fudge without the need for boiling to a specific temperature.
- Do NOT Confuse with Evaporated Milk: These are two entirely different products. Evaporated milk is unsweetened and will not work in this recipe. Ensure you grab the can labeled "sweetened condensed milk."
3. Butter (Unsalted Recommended)
- For Richness and Texture: Butter adds incredible richness, a subtle flavor, and contributes to the fudge's silky, melt-in-your-mouth texture. It also helps prevent the fudge from sticking too much to the pan and gives it that luxurious mouthfeel.
- Unsalted vs. Salted: Unsalted butter is generally recommended in baking so you can control the salt content. If you only have salted butter, it will work, but you might want to skip any additional salt you might add for flavor enhancement.
Your Step-by-Step Guide to Flawless 3-Ingredient Chocolate Fudge
Making this chocolate fudge recipe is incredibly straightforward. Follow these simple steps for perfect results every time:
What You'll Need (Tools):
- 8x8-inch or 9x9-inch baking pan
- Parchment paper or aluminum foil
- Medium microwave-safe bowl (or a double boiler setup)
- Spatula or sturdy spoon
- Measuring cups/spoons
Instructions:
- Prepare Your Pan: Line an 8x8 or 9x9-inch baking pan with parchment paper or aluminum foil, leaving an overhang on the sides. This "sling" will make it incredibly easy to lift the set fudge out of the pan for cutting. Lightly grease the paper/foil with butter or non-stick spray to ensure no sticking.
- Combine Ingredients: In a medium microwave-safe bowl, combine your chocolate chips, sweetened condensed milk, and butter (cut into a few pieces to help it melt evenly).
- Melt Gently (Microwave Method): Heat the mixture in the microwave in 30-second intervals, stirring thoroughly after each interval. It’s crucial not to overheat the chocolate, as this can cause it to seize or burn. Continue heating and stirring until the mixture is completely smooth and melted. This usually takes 2-3 minutes total, depending on your microwave's power.
- Melt Gently (Stovetop Double Boiler Method - Alternative): If you prefer not to use a microwave, you can use a double boiler. Place the chocolate chips, sweetened condensed milk, and butter in a heatproof bowl set over a saucepan of simmering water (ensure the bowl doesn't touch the water). Stir constantly until the mixture is smooth and melted.
- Stir Until Silky: Once melted, stir the mixture vigorously for a minute or two. This ensures all ingredients are well combined and creates that incredibly smooth, glossy finish that makes homemade fudge so appealing. This step is key for a truly melt-in-your-mouth texture.
- Pour and Chill: Pour the fudge mixture evenly into your prepared pan. Use your spatula to spread it smoothly to the edges, ensuring an even thickness.
- Set in the Fridge: Place the pan in the refrigerator for at least 2-4 hours, or until the fudge is firm enough to cut. For best results and easy slicing, chilling overnight is ideal. Patience is a virtue when waiting for perfect chocolate fudge!
- Cut and Serve: Once firm, use the parchment paper overhang to lift the fudge slab out of the pan. Place it on a cutting board and cut into desired squares using a sharp knife. For clean cuts, you can warm your knife slightly with hot water and wipe it clean between cuts.
Elevate Your Fudge: Delicious Variations & Gifting Ideas
This 3-ingredient chocolate fudge recipe is fantastic on its own, but it's also a perfect blank canvas for creativity. Experiment with these ideas to make it uniquely yours:
Flavor Variations:
- Nutty Delight: Stir in 1/2 to 1 cup of chopped nuts (walnuts, pecans, almonds) after the fudge is melted and smooth for a classic crunchy addition.
- Mint Chocolate: Add 1/2 to 1 teaspoon of peppermint extract to the melted fudge mixture, along with a few drops of green food coloring if desired. Top with crushed peppermints for a festive touch.
- Mocha Fudge: Dissolve 1-2 teaspoons of instant espresso powder or coffee granules into the sweetened condensed milk before melting, or add it directly to the melted mixture for a rich coffee kick.
- Orange Zest: Add 1-2 teaspoons of fresh orange zest for a bright, citrusy counterpoint to the chocolate, creating a sophisticated flavor profile.
- Salted Caramel Swirl: After pouring the fudge into the pan, dollop spoonfuls of store-bought caramel sauce on top and swirl gently with a knife. Sprinkle with flaky sea salt for an irresistible sweet and savory treat.
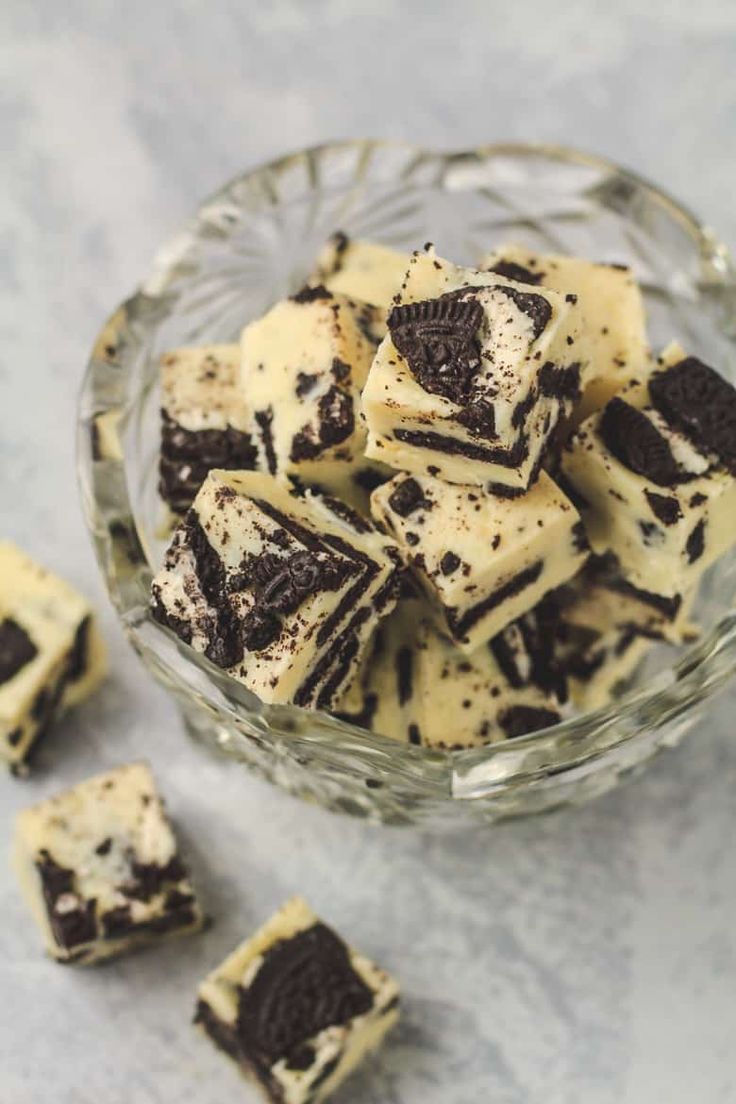
- White Chocolate & Berries: Substitute semi-sweet chocolate chips with white chocolate chips. Stir in dried cranberries or chopped freeze-dried strawberries for a colorful and fruity twist.
- Cookie Crunch: Fold in crushed Oreos, graham crackers, or shortbread cookies for added texture and a familiar, comforting flavor.
Gifting & Presentation:
Homemade fudge makes an absolutely wonderful gift. It keeps beautifully and travels well, making it ideal for holidays, hostess gifts, or a simple gesture of appreciation. Think about the joy of receiving a box of Grandma's Secret: Best Homemade Chocolate Fudge for Gifting, and adapt that care to your easy version!
- Packaging: Arrange fudge squares in a decorative tin, a small bakery box lined with parchment paper, or elegant cellophane bags tied with ribbon.
- Labels: Add a handmade tag with the flavor (e.g., "Classic Chocolate Fudge," "Walnut Fudge") and a short, sweet message.
- Fudge Platter: For parties, arrange different flavored fudge squares on a platter for an impressive dessert spread that caters to all tastes.
Storage Tips:
- Room Temperature: Fudge can be stored at cool room temperature in an airtight container for up to 5-7 days, especially if it's not too humid.
- Refrigerator: For longer storage and to maintain firmness, keep fudge in an airtight container in the refrigerator for up to 2-3 weeks.
- Freezer: For extended enjoyment, wrap individual pieces or blocks of fudge tightly in plastic wrap, then place them in a freezer-safe bag or container. It can be frozen for up to 2-3 months. Thaw in the refrigerator or at room temperature before serving.
Conclusion
You now possess the ultimate secret weapon for quick, delicious, and undeniably impressive chocolate fudge. This 3-ingredient chocolate fudge recipe proves that you don't need to be a pastry chef or spend hours in the kitchen to create a treat that tastes like it came from a gourmet candy shop. Its simplicity, speed, and foolproof nature make it a perfect addition to any dessert repertoire. So go ahead, gather your ingredients, and whip up a batch of this velvety smooth perfection. Your taste buds, your family, and anyone lucky enough to receive a piece will thank you!
