Easy Classic Chocolate Fudge: Your Go-To Homemade Recipe
There's something uniquely comforting about a piece of homemade chocolate fudge. It transports you back to simpler times, perhaps to a bustling holiday kitchen or a childhood visit to Grandma's house. This isn't just any fudge; it's the kind that boasts a rich, creamy texture and a melt-in-your-mouth smoothness that seems to defy its humble origins. If you've been searching for that perfect, old-fashioned **chocolate fudge recipe** that's both easy to make and utterly irresistible, your quest ends here.
This classic boiled fudge method, often perceived as intimidating, is surprisingly straightforward and yields consistently spectacular results. With just a handful of simple ingredients and about twenty minutes of active cooking time, you'll be on your way to a pan of confectionery bliss. Whether it's for holiday gifting, a cherished spot on a cookie tray, or simply to satisfy a deep chocolate craving, this timeless treat is guaranteed to hit the spot every single time. Get ready to create a dessert that will be remembered and requested for years to come.
The Irresistible Allure of Classic Chocolate Fudge
Why does homemade chocolate fudge hold such a special place in our hearts? For starters, it’s a taste of nostalgia. That perfect balance of sweetness and deep chocolate flavor, coupled with an incredibly smooth texture, reminds many of the treats their grandmothers used to make. Unlike many modern desserts that rely on complex techniques or obscure ingredients, this classic **chocolate fudge recipe** embraces simplicity, using everyday pantry staples to create something extraordinary.
Making fudge from scratch offers immense satisfaction. There’s a certain magic in watching basic ingredients transform into a decadent confection right before your eyes. Furthermore, homemade fudge is simply superior to most store-bought varieties. You control the quality of the chocolate, the freshness of the butter, and the purity of the vanilla, resulting in a flavor profile that is richer, more nuanced, and free from artificial additives. It’s also incredibly versatile, making it ideal for everything from elegant holiday dessert platters to casual movie nights with family. And let’s not forget its impressive shelf life, meaning you can enjoy your efforts for weeks, or even months, if stored properly.
Gather Your Simple Ingredients for Fudge Perfection
One of the most appealing aspects of this classic **chocolate fudge recipe** is its reliance on readily available, fundamental ingredients. You won't need to hunt for anything exotic; chances are, most of these items are already in your pantry. However, using quality ingredients will always elevate your final product.
Here’s what you’ll need:
* **Evaporated Milk:** This is a crucial component that contributes to the fudge's signature creaminess and depth of flavor. Don't confuse it with sweetened condensed milk (though that's key in a different, equally delicious 3-ingredient fudge method!). Evaporated milk is simply milk that's had about 60% of its water removed, resulting in a richer, slightly caramelized taste.
* **Granulated Sugar:** The primary sweetener, providing structure and that characteristic sweet taste.
* **Mini Marshmallows:** These little wonders are more than just a sweet addition; they play a vital role in achieving the fudge's incredibly smooth, melt-in-your-mouth texture. They help prevent crystallization and contribute to the creamy consistency.
* **Semi-Sweet Chocolate Chips:** The heart of your fudge! Using good quality chocolate chips will significantly impact the flavor. Semi-sweet offers a balanced chocolatey taste that isn't overly bitter or too sweet. You can experiment with dark chocolate for a richer fudge or milk chocolate for a milder, sweeter version.
* **Unsalted Butter:** Adds richness, gloss, and helps with the texture. Unsalted is preferred so you can control the salt content yourself, though a pinch of salt often enhances the chocolate flavor.
* **Vanilla Extract:** A splash of pure vanilla extract rounds out the flavors, adding warmth and complexity. Don't skimp on good quality vanilla!
Mastering the Boiled Method: Your Step-by-Step Chocolate Fudge Recipe
The traditional boiled method is what gives classic fudge its distinctive, divinely smooth texture. While it involves a candy thermometer, don't let that deter you! With a little patience and attention to detail, you’ll master it in no time.
Essential Tools for Success
Before you begin, gather your equipment. Having everything ready will make the process much smoother:
- **Heavy-Bottomed Saucepan:** Essential for even heating and preventing scorching.
- **Candy Thermometer:** Non-negotiable for precise temperature control, ensuring your fudge sets perfectly.
- **Electric Mixer (or strong whisk):** For combining ingredients until silky smooth.
- **9x13 inch Baking Pan:** Or an 8x8 inch for thicker fudge.
- **Parchment Paper:** For lining your pan, making removal and cutting a breeze.
- **Rubber Spatula:** For scraping and folding.
The Fudge-Making Process: A Detailed Guide
Follow these steps for a perfect batch of homemade chocolate fudge:
- Prepare Your Pan: Line your chosen baking pan (a 9x13-inch pan for thinner fudge, or an 8x8-inch pan for thicker squares) with parchment paper, leaving an overhang on the sides. This acts as a sling for easy removal later.
- Combine & Heat: In your heavy-bottomed saucepan, combine the evaporated milk, granulated sugar, and mini marshmallows. Place the pan over medium heat, stirring constantly until the sugar dissolves and the marshmallows are fully melted and incorporated.
- Boil & Cook: Bring the mixture to a rolling boil. Once boiling, insert your candy thermometer without letting it touch the bottom of the pan. Continue to boil, stirring occasionally to prevent sticking, until the mixture reaches exactly **234°F (112°C)**. This is known as the "soft ball stage," where a drop of the mixture in cold water forms a soft, pliable ball. This usually takes about 10 minutes of boiling, but always rely on your thermometer.
- Prepare Finishing Bowl: While the mixture boils, place your chocolate chips, butter, and vanilla extract in a large, heat-proof mixing bowl.
- Combine & Mix: As soon as the boiled mixture hits 234°F, remove it immediately from the heat. Carefully pour the hot mixture directly over the chocolate chips, butter, and vanilla in the separate bowl. Do NOT stir yet. Let it sit for about a minute or two; the residual heat will begin to melt the chocolate and butter.
- Whip to Perfection: Using an electric mixer (or vigorous hand stirring with a sturdy spatula), begin mixing on low speed, then increase to medium. Continue mixing until the fudge is completely smooth, glossy, and begins to thicken slightly. This can take a few minutes. You're looking for a consistency where it starts to lose its sheen and hold its shape. Over-mixing can result in dry, crumbly fudge, so stop as soon as it's perfectly smooth and thick.
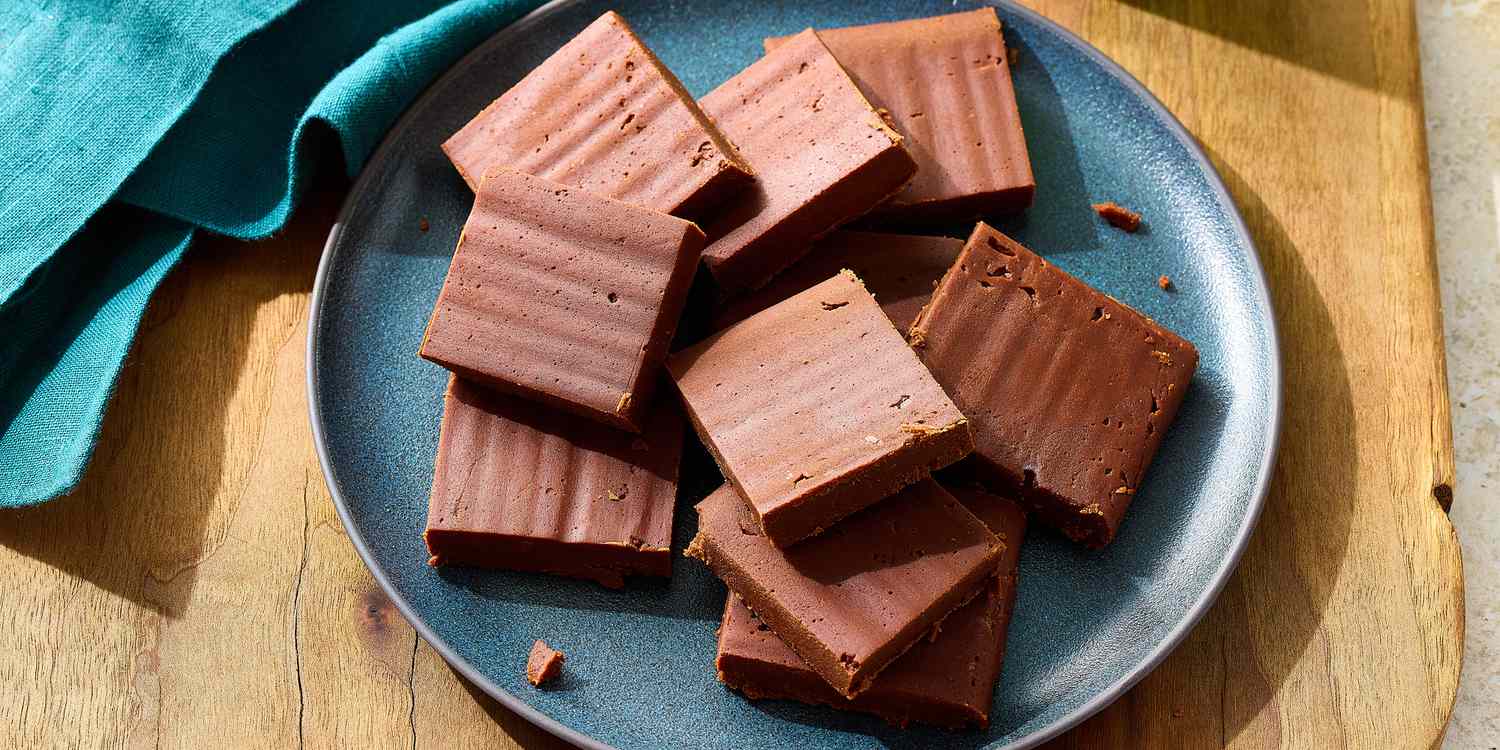
- Chill & Cut: Quickly pour the warm fudge into your prepared parchment-lined pan. Spread it evenly with a spatula. Let it cool at room temperature for about 30 minutes, then transfer it to the refrigerator to chill for at least 2-3 hours, or until fully firm. Once firm, use the parchment paper overhang to lift the fudge out of the pan. Place it on a cutting board and cut into desired squares using a sharp, warm knife.
Critical Temperature & Altitude Adjustments
The **234°F soft ball stage** is absolutely critical for classic fudge. Cooking it too little will result in fudge that’s too soft and won’t set, while cooking it too long will yield crumbly, dry fudge.
A crucial point often overlooked is **altitude**. If you live at a higher elevation, water boils at a lower temperature, and this affects candy making. For every 1,000 feet of elevation above sea level, you should reduce the target temperature by 2°F. For example, if you're at 5,000 feet, aim for 224°F instead of 234°F. Adjusting for altitude ensures your fudge reaches the correct consistency.
Unlock Endless Flavor Adventures: Fudge Variations & Add-Ins
While this classic **chocolate fudge recipe** is perfect as is, it also serves as an exceptional blank canvas for culinary creativity. Once you’ve mastered the basic recipe, the possibilities for customization are virtually endless.
Here are some popular and delicious variation ideas:
* **Nutty Delights:** Stir in 1-1½ cups of chopped nuts (walnuts, pecans, almonds, or even peanuts) into the fudge mixture just before pouring it into the pan.
* **Chocolate Lovers' Dream:** Swap semi-sweet chips for dark chocolate for a more intense flavor, or milk chocolate for a sweeter, creamier fudge. You could even swirl in some melted white chocolate before chilling for a beautiful marbled effect.
* **Minty Fresh:** Add ½ teaspoon of peppermint extract along with the vanilla for a festive treat, especially around the holidays. You can also sprinkle crushed candy canes on top.
* **Citrus Zest:** A teaspoon of finely grated orange or tangerine zest can add a bright, unexpected twist to the rich chocolate.
* **Espresso Boost:** Stir in 1-2 teaspoons of instant espresso powder with the chocolate chips to deepen and enhance the chocolate flavor without making it taste like coffee.
* **Cookie Crumble:** Fold in crushed sandwich cookies (like Oreos) or shortbread cookies for added texture and flavor.
* **Salty Caramel Swirl:** Drizzle homemade or store-bought caramel sauce over the fudge after pouring it into the pan, then swirl gently with a knife. A sprinkle of sea salt flakes on top would be divine.
* **Spice It Up:** For an adventurous palate, add a pinch of cayenne pepper or chili powder to the chocolate mixture for a subtle, warming kick.
If the boiled method seems a bit much for your first foray into fudge-making, remember there are even simpler alternatives! For a truly foolproof and quick option, explore recipes that use just three ingredients: chocolate chips, sweetened condensed milk, and butter. This method, while yielding a slightly different texture, is incredibly easy and delicious. You can learn more about it here:
Whip Up Perfect 3-Ingredient Chocolate Fudge, No Fuss!
Tips for Flawless Fudge Every Time & Troubleshooting Common Issues
Achieving perfect fudge isn't just about the recipe; it's also about technique. Here are some invaluable tips and common troubleshooting solutions to ensure your fudge always turns out beautifully:
Preventing Crystallization (Grainy Fudge)
Grainy fudge is a common complaint, often caused by sugar crystals forming.
- Don't Scrape the Sides: Once your mixture starts boiling, avoid scraping down the sides of the pan with a spoon, as this can introduce sugar crystals back into the mixture.
- Wash Down Crystals: Before boiling, you can use a pastry brush dipped in water to "wash down" any sugar crystals clinging to the sides of the pan.
- Correct Temperature: Ensure you hit the exact soft ball stage (234°F). Overcooking or undercooking can contribute to crystallization.
- Don't Stir While Cooling: After pouring the hot mixture over the chocolate, resist the urge to stir until the mixture has cooled slightly and the chocolate is melted. Premature stirring can encourage crystal formation.
Troubleshooting Consistency
- Fudge Too Soft/Doesn't Set: This usually means it wasn't cooked to a high enough temperature. If you catch it early, you can sometimes return it to the saucepan, bring it back to a boil, and cook it to the correct temperature. If it's already set slightly, you might be able to re-melt it over low heat, add a splash of evaporated milk, and recook.
- Fudge Too Hard/Crumbly: The mixture was likely cooked past the soft ball stage, becoming too dry. Unfortunately, this is harder to fix. You can try gently re-melting it with a tablespoon or two of milk or cream, stirring until smooth, and then re-chilling, but it might still be a bit crumbly.
Cutting Tips
For clean, professional-looking squares:
- Ensure the fudge is fully chilled and firm.
- Use a large, sharp knife.
- For extra clean cuts, run the knife under hot water and wipe it dry between each cut. This prevents sticking.
Storage Best Practices
Proper storage ensures your delicious fudge stays fresh and delightful for as long as possible.
- Room Temperature: If kept in an airtight container, homemade fudge will last for about 1 week.
- Refrigerator: For extended freshness, store in an airtight container in the refrigerator for up to 3-4 weeks. Layer parchment paper between squares to prevent sticking.
- Freezer: Fudge freezes beautifully! Wrap individual pieces or layers tightly in plastic wrap, then place them in an airtight freezer-safe container or bag. It can be frozen for up to 3 months. Thaw in the refrigerator or at room temperature.
Homemade Fudge: The Ultimate Gift and Make-Ahead Treat
Beyond its delicious taste, one of the greatest advantages of this classic **chocolate fudge recipe** is its incredible versatility as a gift and a make-ahead treat. Homemade fudge is the epitome of thoughtful giving. A beautifully packaged box of your handcrafted fudge conveys warmth, care, and a personal touch that store-bought items simply can't match.
For holiday gifting, bake sales, or hostess gifts, simply cut the fudge into uniform squares, arrange them in decorative tins or cellophane bags, tie with a festive ribbon, and perhaps add a small handwritten tag. It’s a guaranteed crowd-pleaser and a truly memorable present. Given its robust nature, homemade fudge travels exceptionally well, making it ideal for shipping to loved ones or bringing to gatherings. Its ability to keep fresh for weeks in the refrigerator or months in the freezer also makes it a fantastic make-ahead option. You can prepare large batches well in advance of a busy season, freeing up your time when you need it most. For more specific tips on presentation and making your fudge an extra special gift, explore resources like
Grandma's Secret: Best Homemade Chocolate Fudge for Gifting.
Your Go-To Fudge, Made Easy
There you have it – a comprehensive guide to crafting the most delightful, easy classic chocolate fudge your kitchen has ever seen. This **chocolate fudge recipe** is more than just a list of ingredients and steps; it's an invitation to create memories, share joy, and indulge in the simple pleasure of homemade goodness. With its rich, creamy texture and timeless appeal, this recipe will quickly become your trusted go-to. So, tie on your apron, grab your candy thermometer, and prepare to impress everyone with your newfound fudge-making prowess. Happy fudging!